Creating a New Document in Adobe Illustrator
Creating a New Document in Adobe Illustrator, before you step into this process there are a few variable to set. Adobe Illustrator is a resolution independent art work, once it is being setup , it will be difficult to changed. So before even we start any of the process, all the basic fundamental or structure should be configure.
Setting Up New Project from scratch using Adobe Illustrator
Follow the Setup below step by step to create a New Document from scratch.
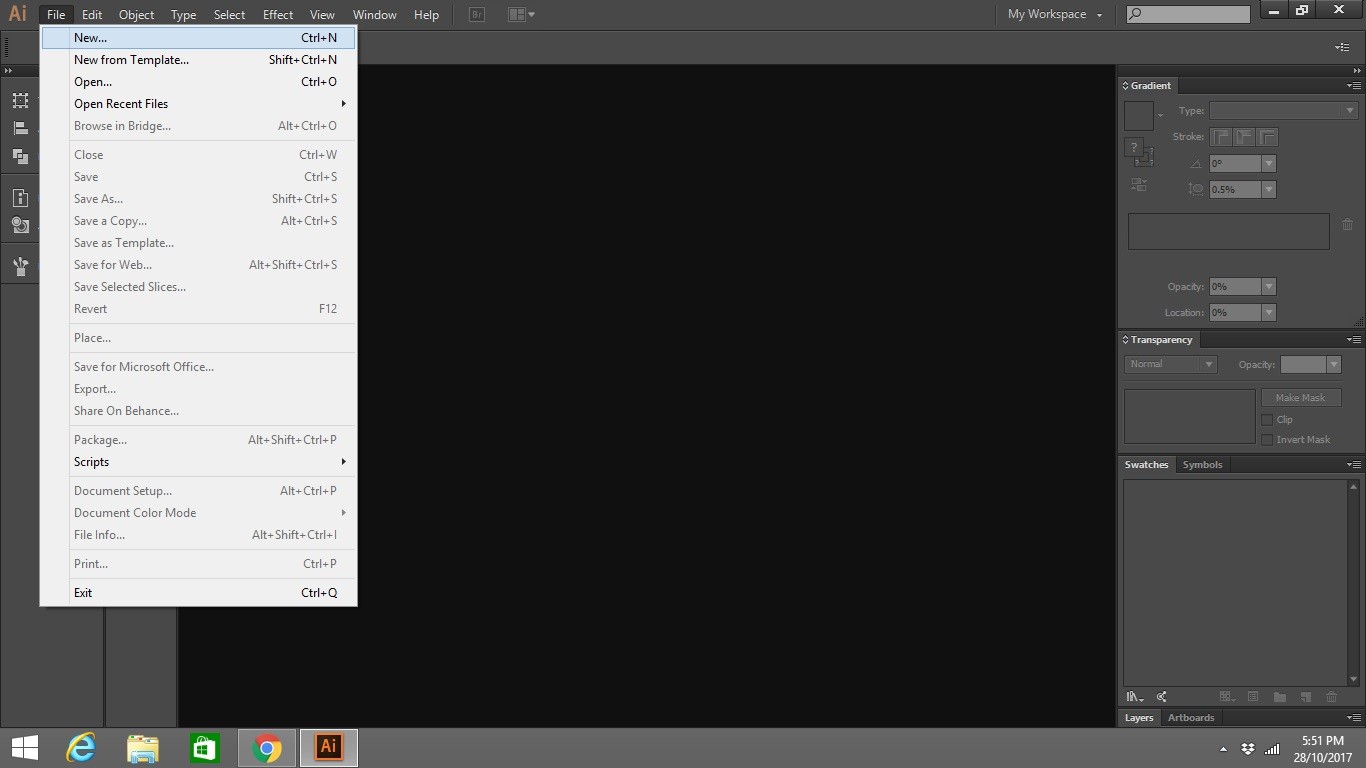
Step 1:
Open Adobe Illustrator,Navigate to File,and click new .
Step 2: Setting Up Parameter
- Provide a file name for your new document.
- At Profile select ” Custom Profile”
- Select the numbers of art board that you need for your project
- Select the Paper Size of your Project.
- When you select the Paper Size it will automatically assign the Width and Height
- If you have a custom paper you can modified the Project Width and Height
- Choose the SI Unit that you need.There are a few to be choose from ,Points , Picas, Inches , Millimetres, Centimetres, Pixel.
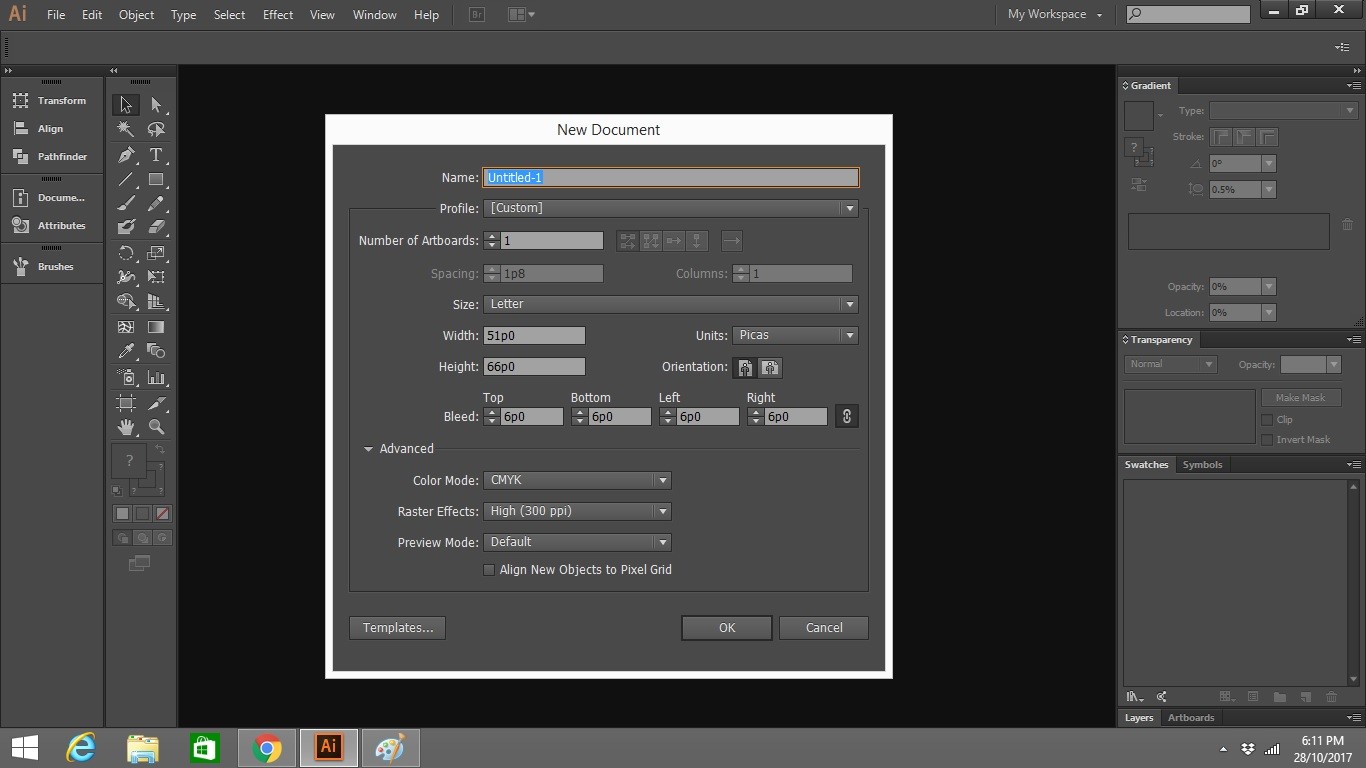
Step 3: Configuring Paper Bleed size
The Bleed function is very useful for press printing. By configuring the bleed function, you will be able to print the Artwork towards the edge of the Bleed Area. Area outside the Bleed can be trimmed or cut off.

Now you are all set , you can start working on your project.
Check out how to create your own customised work space at Adobe Illustrator.
Leave a Reply